Browse Tech Tips
>
Speaker Door Panel Installation
Speaker Door Panel Installation
The following instructions are merely suggested options for installation. Dixie Monte Carlo is only responsible for the parts that it ships and is not responsible for faulty installations. Labor claims will not be acknowledged. If you are not familiar with the processes listed below, please seek the help of a professional automotive technician.
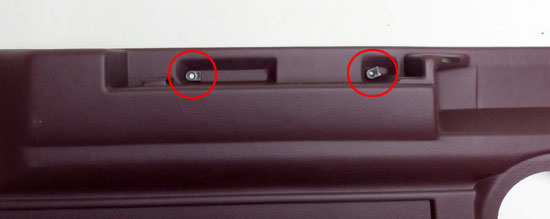
1. Your new door panels should have arrived with L/H & R/H panels, carpet inserts and a bag of installation hardware. Installation is the same for both single and dual speaker versions.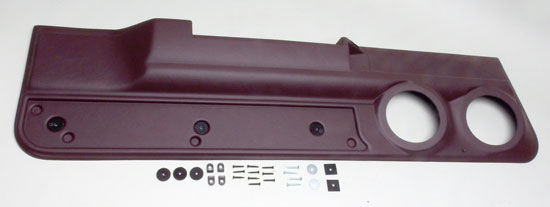 2. These replacement panels attach to the door shells with screws rather than the plastic retainers that GM used. Each panel will be held in place with 2 screws behind the armrest (uses the factory location here), 1 screw at the front edge just forward of the speaker, 1 screw below the speaker and 3 screws behind the carpet insert panel. Each screw is self-tapping so there should not be a need to drill any holes unless you prefer to.3. Start the installation by attaching the door panel with the factory screws located on the top edge behind the arm rest. Use the supplied D-shaped washers on each screw (as seen in the photo below). These washers will help strengthen this area of the panels since much of the force of closing the door happens here.
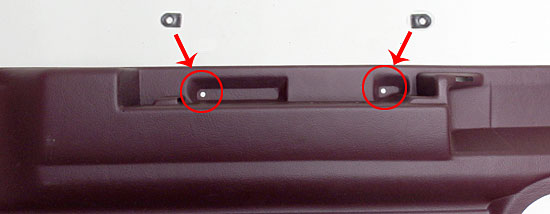 4.
4. 5. With the 2 upper screws snugged in place, you can now locate the screw holes along the bottom and front edge. Once you have the panel level with your door shell, attach the screws in front of and below the speaker pods. Each screw is self-tapping so there is no need to pre-drill the holes unless you prefer to.
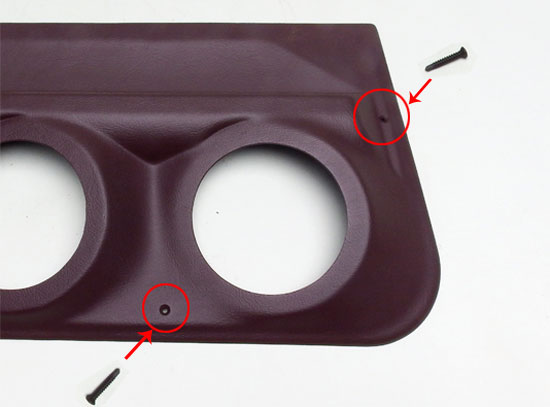 6. Prior to installing the screws on the bottom portion beneath the carpet insert panel, make sure to install a scotch-lock on each screw. This scotch-lock will be used to hold the carpet insert panel in place (you will see corresponding scotch-locks on the back of the insert panels).
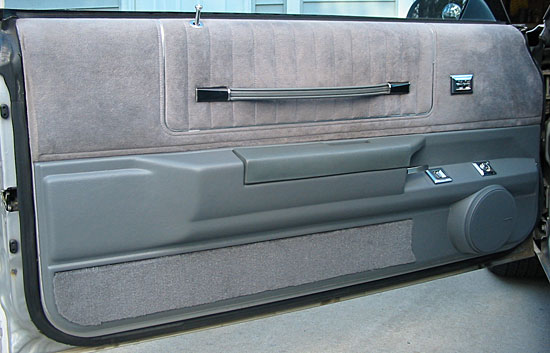
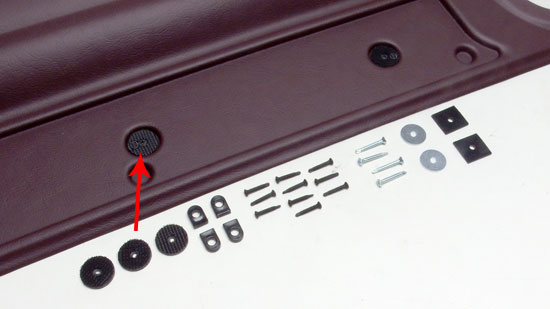 7. Once all of the screws are in place, go around and evenly tighten each. Keep in mind that they do not need to be tightened too much as you don't want to over stress the plastic or strip the new screw holes in the door shell. Included in each hardware kit are a couple plastic spacer blocks. These can be sandwiched between the door panel and the door shell on the bottom forward most hole (below the speaker pod). This block will simply act as a spacer to fill the void between the two.8. The insert panel can be painted to match the door panel or carpeted like the factory. Both options are shown below. Please give us a call if you would prefer carpeted inserts, we would be happy to quote and assemble these for you.
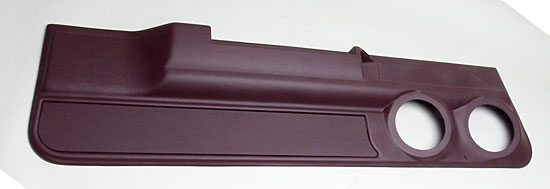 9. Painted, carpeted and installed.